


Table of Contents
- Why Outdoor Signs Rust and How to Stop It
- Choosing the Right Material: Aluminum vs Steel Signs for Outdoors
- Surface Preparation: The Foundation of Rust Prevention
- Applying the Best Clear Coat for Outdoor Metal Signs
- Step-by-Step Rust Prevention Process
- Regular Maintenance and Environmental Considerations
- Lubricants, Sealants, and Long-Term Protection
- Conclusion
Last Updated: August 27, 2026
Why Outdoor Signs Rust and How to Stop It
Metal oxidation occurs when metal reacts with oxygen in the air, creating corrosion that weakens outdoor signage. When moisture combines with oxygen, especially in humid climates or near coastal areas where salt spray accelerates the process, rust forms rapidly on unprotected metal surfaces.
Your outdoor sign faces constant battle against rain, humidity, temperature swings, and UV exposure. But rust isn't inevitable. With proper surface preparation, protective coatings, and maintenance, you can keep your metal sign looking sharp for years. The difference between a sign that lasts five years and one that lasts fifteen often comes down to prevention strategy.
Choosing the Right Material: Aluminum vs Steel Signs for Outdoors
Aluminum is naturally corrosion-resistant because it forms a thin oxide layer that protects the underlying metal. Steel rusts aggressively without proper protection because iron oxidizes freely when exposed to moisture and oxygen.
For outdoor use, aluminum wins on durability. It doesn't require as much maintenance as steel and resists rust naturally. However, aluminum can still corrode in harsh environments, particularly near saltwater or in high-humidity areas, so it still needs protective coatings for long-term outdoor exposure.
Steel offers affordability and strength but demands consistent care. Galvanized steel (steel coated with zinc) provides better corrosion resistance than bare steel, making it a smarter choice for outdoor applications (astm.org).
For most homeowners, aluminum signs deliver better real-world results outdoors. The material's natural oxide layer gives you a head start on corrosion resistance that steel simply doesn't have.
Surface Preparation: The Foundation of Rust Prevention
Surface preparation is where rust prevention begins. A protective coating is only as strong as the surface it bonds to. Apply it over dirt, grease, or existing oxidation, and the coating will fail prematurely, trapping moisture underneath.
Cleaning and Degreasing Your Sign
Start with thorough cleaning using mild soap and water to remove surface dirt, dust, and grime. For stubborn buildup, use a soft brush or cloth to avoid scratching the metal.
Degreasing is the critical next step many people overlook. Invisible oils from handling, manufacturing residue, or environmental deposits create a barrier that prevents coatings from bonding properly. Use a degreasing solution appropriate for your metal type; alkaline degreasers work well for aluminum and steel.
Here's the process:
- Rinse the sign thoroughly with clean water
- Apply degreasing solution following product instructions
- Scrub gently with a soft brush or cloth
- Rinse completely until no residue remains
- Dry thoroughly with a clean cloth or compressed air
The drying step matters more than most realize. Any water left on the surface creates an environment where rust can begin forming immediately.
Removing Existing Rust from Metal Signs
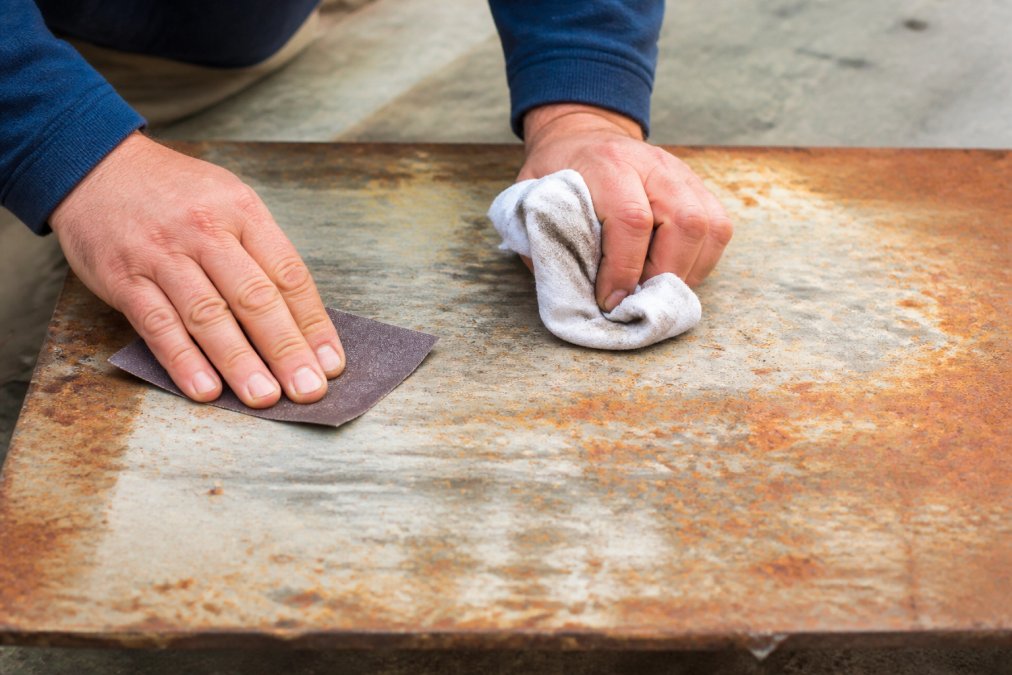
If your sign shows rust spots or surface oxidation, remove it before applying new protection. Light surface rust can be addressed with abrasive cleaning methods.
For light oxidation and surface rust:
- Use medium-grit sandpaper (80-120 grit) to gently remove rust and oxidation (osha.gov)
- Sand in circular motions until you expose clean metal
- Progress to finer sandpaper (150-220 grit) for a smooth finish
- Wipe away all dust with a damp cloth and dry completely
For heavier rust, consider using a wire brush attachment on a power drill, but exercise caution, aggressive power tools can damage thin metal. A steady hand with manual sandpaper often delivers better results.
After rust removal, bare metal is highly susceptible to new rust formation. Primer and protective coating must happen quickly, ideally within hours of finishing prep work.
Applying the Best Clear Coat for Outdoor Metal Signs
Once your surface is clean and prepared, protective coatings become your primary defense against corrosion. The best clear coat creates a moisture barrier that prevents water from reaching the metal.
Understanding Protective Coatings and Sealants
A protective coating blocks moisture and oxygen from reaching the metal. The best coatings are UV-resistant, flexible enough to expand and contract with temperature changes, and durable enough to withstand outdoor weathering.
Polyurethane coatings offer excellent durability and UV resistance, making them popular for outdoor metal signs (astm.org). They form a hard, protective layer that resists fading and maintains adhesion through temperature swings. Acrylic coatings are more budget-friendly but typically require more frequent reapplication.
When selecting a protective coating, look for products specifically labeled for outdoor metal use. The label should mention UV protection, moisture resistance, and adhesion to metal surfaces.
Powder Coating for Maximum Durability
Powder coating represents the gold standard for outdoor metal sign protection, though it's a professional process, not DIY. The process involves electrostatically applying dry powder that's then cured under heat, creating an exceptionally durable, uniform finish.
Powder coating advantages are significant: superior corrosion resistance compared to liquid coatings, a more uniform protective layer with no drips or runs, and substantially longer lifespan in harsh outdoor environments. The finish is also more resistant to chipping and scratching.
The tradeoff is cost and accessibility. Powder coating requires specialized equipment and expertise. For high-value custom signs or signs in particularly harsh environments (coastal areas, industrial zones), powder coating delivers extended lifespan and reduced maintenance.
For most homeowners, a high-quality polyurethane clear coat applied in 2-3 thin layers provides excellent protection at a fraction of the cost.
Step-by-Step Rust Prevention Process
The process follows a logical sequence: inspect, prepare, prime, coat, and maintain. Skip any step and you compromise the entire protection system.
Step 1: Inspect and Clean Your Sign
Examine your sign for existing rust, damage, or problem areas. Look for surface rust, pitting, peeling coating, trapped moisture, and loose fasteners.
Clean thoroughly using mild soap, water, and a soft brush. Pay special attention to crevices, joints, and areas where water pools. Remove all dirt, grime, and environmental deposits. Dry completely before moving to the next step.
Step 2: Sand and Prepare the Surface
Sanding creates a slightly roughened surface that helps protective coatings adhere properly. Use 120-150 grit sandpaper for most applications. Sand evenly across the entire surface using moderate pressure and circular motions.
After sanding, wipe away all dust using a damp cloth, then dry thoroughly. Any remaining dust particles will create imperfections in your final coating.
If you discover rust during sanding, switch to coarser grit (80-100) to remove it completely, then progress back to finer grits (150-220) for a smooth finish.
Step 3: Apply Primer and Rust-Inhibiting Paint
Primer creates the foundation for your protective coating system. For metal, use a primer specifically formulated for metal surfaces, typically an epoxy or rust-inhibiting primer.
Apply primer in thin, even coats using a brush or spray application. Allow the recommended drying time before applying topcoat, typically 4-8 hours depending on temperature and humidity.
Rust-inhibiting paint contains compounds that actively resist oxidation. Apply paint in 2-3 thin coats rather than one thick coat. Thin coats cure more evenly and create a more durable finish. Between coats, lightly sand with 220-grit sandpaper to improve adhesion, then wipe away dust.
Step 4: Add a Protective Clear Coat
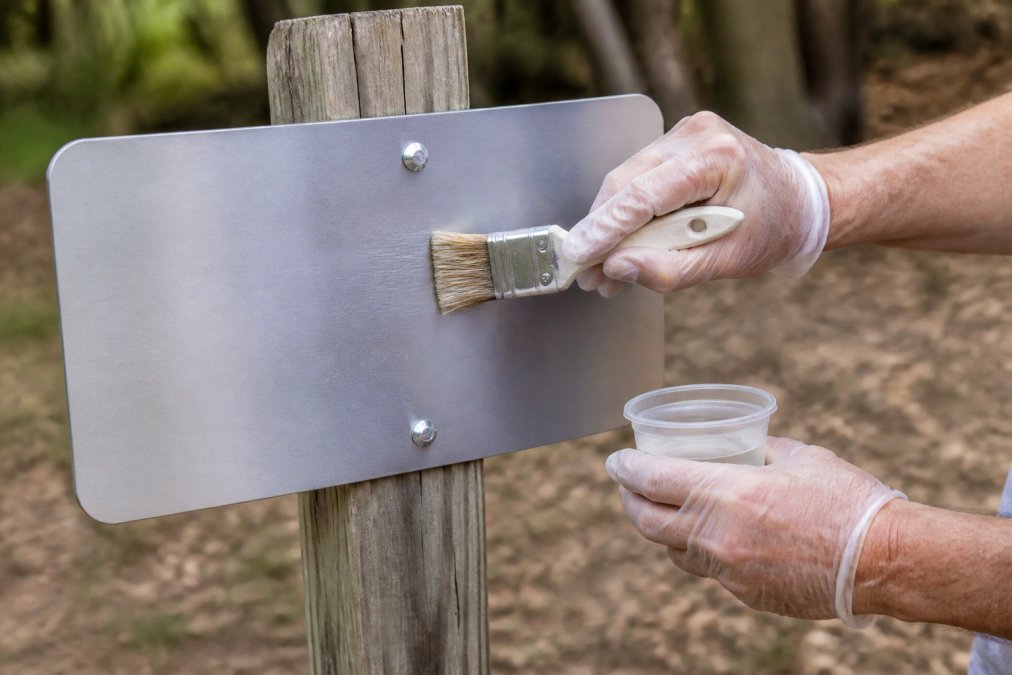
The final layer is your moisture barrier. Apply a polyurethane or acrylic clear coat in 2-3 thin layers, allowing proper drying time between coats per product instructions.
Thin, even coats create better protection than one thick coat that may run or cure unevenly. Use long, smooth brush strokes or spray application for best results.
The entire process, from initial cleaning through final clear coat, typically takes 2-3 days when accounting for drying time between coats.
Regular Maintenance and Environmental Considerations
Applying protective coatings is the beginning, not the end, of rust prevention. Regular maintenance extends the life of your protection system and catches problems early.
Creating a Maintenance Schedule
Inspect your sign every 3-6 months, looking for peeling paint, new rust spots, or damaged areas. Clean the sign twice yearly with mild soap and water, paying special attention to crevices and areas where water pools.
If you notice any coating damage, address it immediately. Small paint chips or cracks allow moisture to reach the metal, where rust can begin forming. Touch up damaged areas with matching paint and clear coat.
In harsh environments, coastal areas, high-humidity regions, or industrial zones, increase inspection frequency to monthly and cleaning to quarterly.
Climate-Specific Protection Strategies
Different climates demand different approaches. In humid environments, focus on moisture barriers and ventilation. Ensure your sign isn't positioned where water pools or gets trapped behind it.
In coastal areas where salt spray accelerates corrosion, upgrade to powder coating if your budget allows. Increase cleaning frequency to remove salt deposits that promote corrosion.
In dry climates, UV protection becomes the priority. Choose coatings with strong UV resistance and plan for recoating every 3-5 years depending on sun exposure intensity.
Temperature swings cause metal to expand and contract, stressing coatings and creating cracks. Flexible polyurethane coatings often outperform rigid acrylic coatings because they accommodate movement without cracking.
Lubricants, Sealants, and Long-Term Protection
Beyond paint and clear coats, additional protective measures extend sign life and prevent corrosion at fasteners and moving parts.
Fasteners (bolts, screws, rivets) are common rust trouble spots. Stainless steel fasteners resist corrosion far better than steel fasteners. Consider replacing standard steel fasteners with stainless steel equivalents during maintenance.
For moving parts, hinged signs, or adjustable components, apply a light lubricating oil to prevent rust while maintaining smooth operation. Use a rust-inhibiting lubricant formulated for outdoor use. Reapply every 6-12 months depending on climate.
Silicone sealants prevent water from entering joints and seams where corrosion often begins. If your sign has welded seams, bolted joints, or anywhere two metal pieces meet, apply silicone sealant to prevent moisture infiltration.
| Protection Layer | Primary Function | Maintenance Frequency | Best For |
|---|---|---|---|
| Primer | Surface adhesion and rust inhibition | Applied once during initial coating | Foundation of protection system |
| Paint or rust-inhibiting topcoat | Corrosion resistance and appearance | Inspect every 3-6 months; touch up as needed | First line of defense |
| Clear coat | Moisture barrier and UV protection | Recoat every 3-5 years depending on climate | Extended durability |
| Sealants | Water infiltration prevention | Reapply every 2-3 years or when visible cracks appear | Joints and seams |
| Lubricants | Fastener and moving part protection | Reapply every 6-12 months | Hinges, bolts, rivets |
Conclusion
Preventing outdoor signs from rusting comes down to understanding the corrosion process and building a multi-layer defense system. Start with the right material, aluminum offers natural corrosion resistance that steel doesn't have. Prepare your surface thoroughly by cleaning, degreasing, and sanding. Apply quality primer and rust-inhibiting paint, then seal everything with a durable clear coat. Finally, commit to regular maintenance and climate-appropriate care strategies.
The investment in proper rust prevention now prevents costly replacement or refinishing later. Whether you're displaying a custom sign in your garden, man cave, or patio, these protection strategies will keep your investment looking sharp and performing reliably for years to come.
Ready to make your space stand out? Explore unique, conversation-starting signs at RealCoolSigns.com and find the perfect piece for your home, office, garage, or gift.
Frequently Asked Questions
How can I prevent rust from forming on outdoor metal signs?
Prevent rust by using galvanized steel or aluminum, applying a rust-inhibiting primer and paint, and sealing with a protective clear coat. Regular cleaning removes moisture and salt spray that accelerate corrosion. For moving parts, apply lubricants to reduce oxidation. Schedule maintenance every 6-12 months depending on your climate, and address any chips in the protective coating immediately. Proper surface preparation before applying any protective layer is essential to stop rust before it starts.
What is the best clear coat to prevent rust on metal signs?
Polyurethane and acrylic clear coats offer excellent UV protection and weatherproofing for outdoor metal signs. Polyurethane provides superior durability and moisture barrier properties, making it ideal for harsh climates. Acrylic clear coats dry faster and are easier to apply. For maximum corrosion resistance, choose a clear coat specifically formulated as a rust inhibitor with UV protection. Always apply clear coat over a properly primed and painted surface for the best results. Test on a small area first to ensure compatibility with your sign's material and existing finish.
Can aluminum signs rust like steel signs do?
Aluminum doesn't rust in the traditional sense, but it does oxidize when exposed to air and moisture, creating a white or gray powdery coating. This oxidation can dull appearance and compromise the protective layer. To prevent aluminum oxidation, apply a protective clear coat or sealant. Aluminum is still an excellent choice for outdoor signs because oxidation happens more slowly than rust on steel, and the process is reversible with proper cleaning and resealing.
How often should I apply a protective sealant to outdoor signs?
Inspect your signs every 3-6 months and reapply sealant annually or when you notice the protective coating wearing thin, fading, or peeling. In harsh climates with high salt spray, humidity, or extreme temperature swings, apply sealant every 6-9 months. Regular cleaning removes environmental contaminants that accelerate degradation. A maintenance schedule based on your specific climate and sign exposure ensures your protective finish stays intact. Touch up chips or scratches immediately to prevent moisture from penetrating and starting corrosion.
Ready to make your space stand out? Explore unique, conversation-starting signs at RealCoolSigns.com and find the perfect piece for your home, office, garage, or gift.