


Table of Contents
- Why Frame Material Matters for Automotive Art
- Best Frame Styles for Car Photography
- Choosing Matting for Car Art
- Understanding UV Protection and Glazing Options
- Framing vs. Mounting Automotive Prints
- Color Theory and Visual Balance in Frame Selection
- Sizing, Aspect Ratios, and Wall Placement
- Preservation and Archival Techniques
- Frequently Asked Questions
Last Updated: September 1, 2026
Framing automotive prints isn't just about throwing a photo in a frame and hanging it on the wall. The right frame can transform a stunning car photo into a gallery-worthy piece that commands attention in your man cave, garage, or living room. At Real Cool Signs, we know that car enthusiasts want their automotive art to look as polished as the vehicles they're displaying. 🏁
The challenge? There are dozens of frame materials, matting options, glazing types, and mounting techniques to choose from. Get it wrong, and even the most beautiful automotive photograph can look flat, dated, or worse, fade within a year. Get it right, and you're creating a focal point that celebrates your passion for cars.
Below, we'll walk you through everything you need to know about choosing frames for automotive prints, from material selection to preservation techniques that keep your art looking showroom-fresh for decades.
Why Frame Material Matters for Automotive Art
The frame material you choose does more than hold your print in place. It sets the tone for your entire display and affects how well your automotive art holds up over time.
Metal frames bring a sleek, contemporary edge that pairs beautifully with modern car photography. Aluminum frames, in particular, are lightweight, durable, and resist warping, a critical advantage if your garage experiences temperature swings. They work especially well for high-contrast automotive images, like black-and-white racing shots or vibrant muscle car photography. The clean lines of metal frames won't compete with bold car imagery; instead, they enhance it.

Solid wood frames offer warmth and classic appeal. They're ideal if you're displaying vintage car prints or want a more traditional gallery feel in your space. Wood frames come in countless finishes, from natural oak to deep espresso, giving you flexibility to match your décor. However, wood can be vulnerable to moisture and temperature fluctuations, so proper environmental control matters if you're in a humid climate or placing prints near windows.
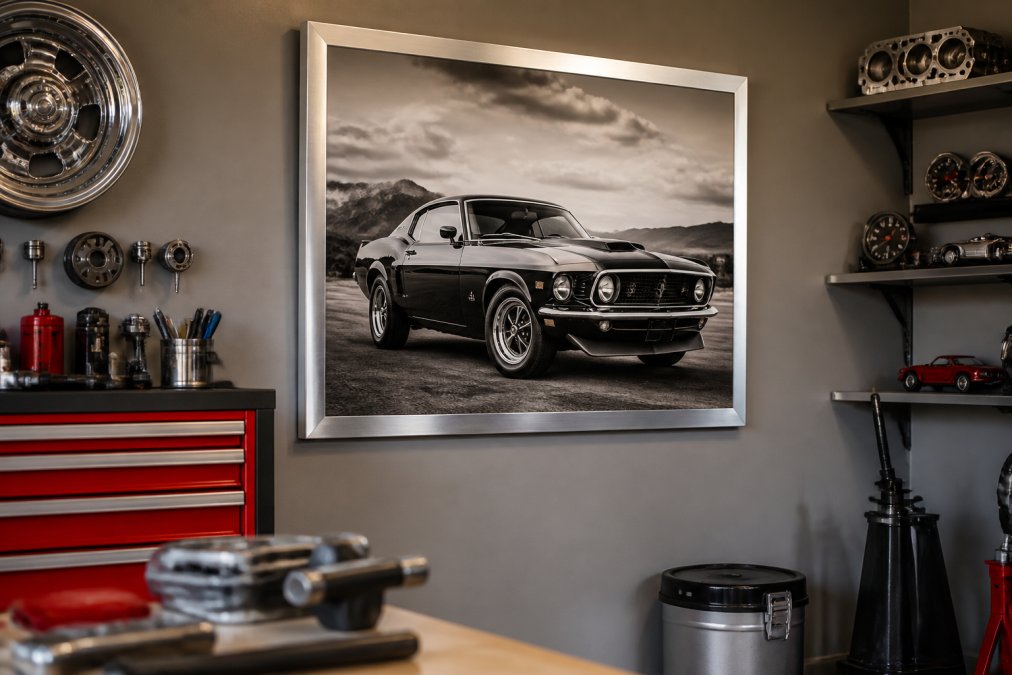
The material also influences visual weight. A thick, ornate wooden frame can overwhelm a delicate sports car illustration, while a slim metal frame keeps the focus on the subject. Consider the composition of your automotive print when choosing frame profile and thickness.
Best Frame Styles for Car Photography
Not all frames work equally well for automotive imagery. The style you choose should complement the car's era, the photograph's mood, and your space's overall aesthetic.
Metal Frames for Modern Aesthetics
Metal frames, particularly sleek aluminum designs, have become the go-to choice for contemporary automotive photography. They're clean, minimal, and they don't distract from the subject. A thin metal frame around a high-resolution digital print of a modern sports car creates an almost gallery-museum effect. 🖼️
Metal frames also resist the warping and expansion that can plague wood in garages where temperatures fluctuate. If you're displaying automotive prints in a space that isn't climate-controlled, metal is your safer bet. The frame profile should be relatively thin (typically 0.75 to 1.5 inches) to maintain that modern aesthetic without overwhelming the image.
Brushed aluminum finishes tend to work best with color automotive photography, while polished metal can enhance black-and-white racing images. The reflective quality of polished metal adds visual interest without competing with the print itself.
Solid Wood for Classic Appeal
Solid wood frames bring character and warmth to vintage car prints. A 1957 Chevy deserves more than a minimalist metal frame, it deserves the gravitas that a quality wood frame provides. Deep mahogany, walnut, or cherry finishes complement classic automotive imagery beautifully.

The key with wood is choosing the right profile. Wider frames (1.5 to 2.5 inches) work well for larger prints and add presence to the display. Narrower frames feel more contemporary and suit smaller prints or modern interpretations of classic cars.
One important consideration: wood frames require more maintenance. In humid environments, they can swell or develop mold. In dry climates, they may crack. If you're framing an automotive print in a garage or outdoor-adjacent space, ensure the frame is properly sealed and consider adding a backing board to protect against moisture infiltration.
Choosing Matting for Car Art
Matting serves two critical functions: it protects your print from touching the glazing, and it creates visual breathing room around your image. For automotive prints, matting decisions directly affect how the car photograph is perceived.
Acid-free matting is non-negotiable for archival quality. Standard matting contains lignin, which yellows over time and can damage your print through chemical transfer. Acid-free matting preserves the color and condition of your automotive photograph indefinitely.
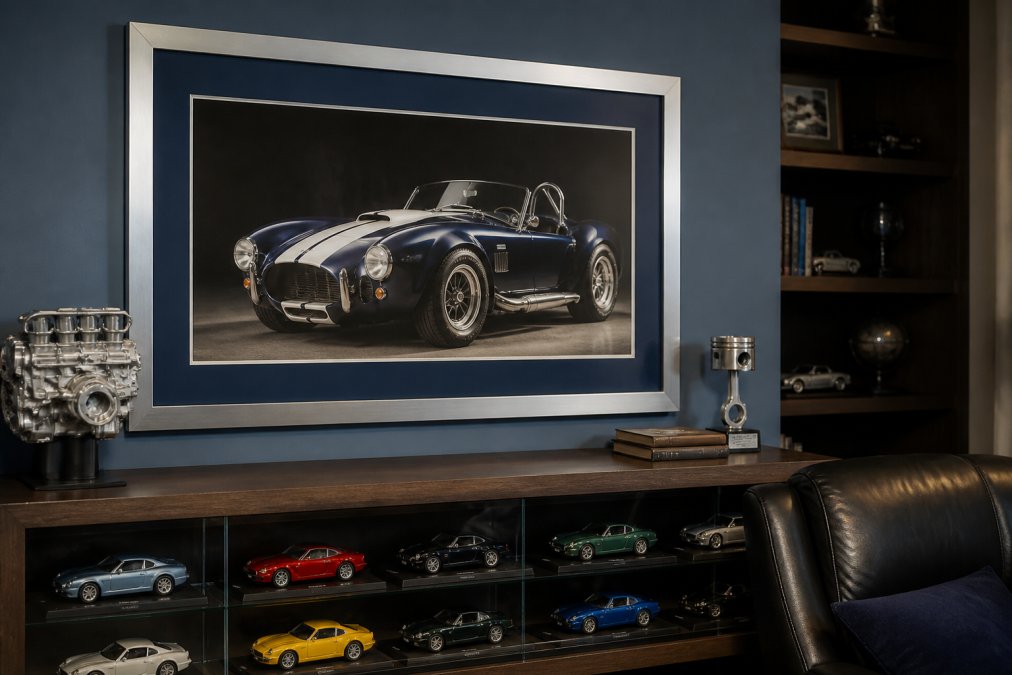
The mat color should either complement or contrast with your print, there's rarely a middle ground that works. A white or off-white mat creates a clean, gallery-like presentation and works with almost any automotive image. A darker mat (charcoal, navy, or black) can intensify the visual impact of a high-contrast car photograph, drawing focus to the subject. Colored mats are trickier; they can either elevate the display or overwhelm it depending on the print's palette.
Mat width matters too. A standard mat typically has a 2 to 3-inch border on the sides and top, with an extra 0.5 inch at the bottom to account for visual weight. For panoramic automotive prints, those ultra-wide shots of a car in motion or a lineup of vehicles, a wider mat (3 to 4 inches) can help balance the elongated aspect ratio.
Understanding UV Protection and Glazing Options
This is where many people make costly mistakes. The wrong glazing choice can fade your automotive print within a few years, even if everything else is perfect.
Museum Glass vs. Acrylic Panels
Museum glass is the gold standard for preserving automotive artwork. It blocks up to 99% of ultraviolet light while maintaining exceptional clarity. The trade-off? Museum glass is heavier and more expensive than standard options. For prints you plan to keep and display long-term, museum glass is worth the investment.
Acrylic panels offer a lighter, more affordable alternative. They block about 70% of UV rays and are shatter-resistant, a practical advantage if your automotive print is displayed in a high-traffic garage or man cave. However, acrylic scratches more easily than glass, and it can yellow slightly over time. Acrylic works well for less valuable prints or temporary displays, but for heirloom-quality automotive photographs, glass is the better choice.
Standard non-UV glass offers minimal protection and should be avoided entirely if your print will receive any direct sunlight. It's the cheapest option, but the cost savings evaporate quickly when your automotive print fades.
Anti-Reflective Glazing for High-Contrast Finishes
Automotive photography often features high-contrast elements, glossy paint, metallic finishes, bright highlights against dark shadows. Standard glass creates reflections that can obscure these details, especially in brightly lit spaces.
Anti-reflective (AR) glazing reduces glare by up to 90%, making it ideal for automotive prints displayed in well-lit rooms or garages with overhead lighting. AR glass maintains the image's color accuracy and detail visibility even when light hits the frame at an angle. The trade-off is cost and slight loss of absolute clarity compared to standard museum glass, though the difference is minimal in real-world viewing.
For panoramic car prints or images with fine detail work, anti-reflective glazing is worth considering. It ensures viewers see your automotive artwork as intended, without fighting reflections.
Framing vs. Mounting Automotive Prints
Some automotive enthusiasts prefer mounting prints directly to the wall using spacers or standoffs rather than traditional framing. Understanding the difference helps you choose the right approach for your space and print.
Traditional framing encases your automotive print completely, providing maximum protection from dust, moisture, and physical damage. The matting, glazing, and backing board work together to preserve the print's condition. This approach is ideal for valuable prints, heirloom photographs, or any automotive art you plan to keep for decades.
Mounting with spacers creates a floating effect, the print appears to hover slightly off the wall, creating visual interest and a modern aesthetic. This approach works beautifully with gallery-quality automotive prints on premium paper stock. However, it offers less protection. Your print is exposed to dust and environmental fluctuations, so it's best suited for climate-controlled indoor spaces and prints you're not overly concerned about preserving long-term.
For most automotive enthusiasts, traditional framing strikes the right balance. It protects your investment while allowing you to display your passion prominently. If you're displaying a high-resolution digital print of a classic car or a rare vintage automotive photograph, framing is the way to go.
Color Theory and Visual Balance in Frame Selection
The frame color you choose can either harmonize with or dramatically shift how your automotive print is perceived. Understanding basic color theory helps you make intentional, impactful choices.
Complementary framing creates visual contrast. A warm wood frame around a cool-toned automotive photograph (like a blue vintage Corvette) creates dynamic tension that draws the eye. Conversely, harmonious framing, a warm frame around warm-toned automotive art, creates a cohesive, calming display.
The car's dominant color should influence your frame selection. A fiery red muscle car print benefits from a neutral frame (black, white, or natural wood) that doesn't compete. A sleek silver sports car photograph can handle a bolder frame color without overwhelming the subject. Consider the focal point of your automotive image and ensure the frame supports rather than distracts from it.
Visual weight also matters. A thick, dark frame carries more visual presence than a thin, light one. Pair heavy frames with large-format automotive prints or images with strong compositional elements. Thinner frames work better with smaller prints or delicate automotive illustrations.
Many car enthusiasts display multiple automotive prints together. If you're creating a gallery wall, consistency in frame style and matting creates cohesion, while varying frame sizes and print orientations add visual interest. The overall composition should feel intentional, not random.
Sizing, Aspect Ratios, and Wall Placement
Automotive prints come in countless sizes and aspect ratios, and choosing the right dimensions for your space is crucial for visual impact.
Standard sizes (8x10, 11x14, 16x20) work well for most spaces, but automotive photography often benefits from panoramic or large-format prints. A panoramic aspect ratio (like 12x36 inches) captures the sweeping lines of a car beautifully. Large-format prints (24x36 or larger) command attention and work best as a focal point in a room.
Consider your wall space realistically. A massive automotive print in a small bedroom can feel oppressive, while a small print in a cavernous garage might disappear. The general rule: your framed automotive print should occupy about one-third of the wall space where it's displayed, creating balance without dominating.
Placement height matters too. The center of your framed automotive print should be at eye level, typically 57 to 60 inches from the floor. This positioning feels natural and allows viewers to engage with the image comfortably. In a garage or man cave with higher ceilings, you can push this slightly higher, but never so high that viewers have to strain their necks.
If you're displaying multiple automotive prints, arrange them with consistent spacing (typically 2 to 3 inches between frames) to create a unified gallery effect. Stagger different sizes and orientations to add visual rhythm without sacrificing cohesion.
Preservation and Archival Techniques
Investing in quality frames and matting means nothing if you don't protect your automotive print from environmental threats.
Acid-free backing board is essential. It sits behind your print and prevents acidic materials from migrating into the artwork. Over time, standard backing board can cause yellowing and deterioration. Archival backing board, while more expensive, ensures your automotive print remains vibrant for decades.
Keep your framed automotive prints away from direct sunlight. UV light is the primary culprit in print fading. If your garage or man cave has windows, position automotive artwork on walls that receive indirect light, or use UV-blocking window film to filter harmful rays.
Temperature and humidity fluctuations accelerate deterioration. Ideally, keep framed automotive prints in spaces where temperature stays between 60 and 75 degrees Fahrenheit and humidity remains between 30 and 50 percent. Basements and uninsulated garages are risky environments; climate-controlled spaces are preferable.
Regular maintenance preserves your investment. Dust your frames gently with a soft cloth every few months. Never use glass cleaner directly on the glazing, spray it on a cloth first to avoid moisture seeping into the frame. If you notice any signs of damage, moisture, or fading, address them immediately.
For truly valuable automotive prints or heirloom photographs, consider professional conservation framing. Conservators use specialized materials and techniques to ensure maximum longevity. It's an investment upfront, but for irreplaceable automotive imagery, it's worth every penny.
Frequently Asked Questions
How do I choose the right frame for an automotive print?
Start by considering the print's color palette and the room's décor. Metal frames suit modern, high-contrast car photography, while solid wood works for vintage prints. Check the print's aspect ratio to match your frame dimensions. For automotive art, prioritize archival quality matting and UV protection glazing to preserve the image. Match your frame finish to your space's aesthetic, brushed aluminum for contemporary settings, dark wood for classic garages.
What's the difference between framing and mounting automotive prints?
Framing uses a complete assembly with frame, matting, backing board, and glazing to protect and display your print with professional archival quality. Mounting attaches the print directly to a backing board or canvas stretcher without a traditional frame. Framing offers better preservation and a finished gallery appearance, while mounting provides a modern, minimalist look. For valuable automotive artwork or long-term display, framing with acid-free matting and UV protection is superior for print longevity.
Should I use glass or acrylic for framing automotive prints?
Museum glass provides superior UV protection and anti-reflective properties, ideal for high-contrast metallic automotive finishes and high-traffic areas. Acrylic panels are lighter, more affordable, and safer for large formats, but offer less glare reduction. For prints with vibrant colors or metallic effects, museum glass prevents fading and reflection. If weight or budget is a concern, anti-reflective acrylic is a practical alternative. Consider your room's lighting when choosing, bright natural light benefits from anti-reflective options.
What matting should I choose for car art?
Select acid-free matting to prevent yellowing and preserve your print's colors over time. Choose matting colors that complement your automotive image, neutral tones like white, cream, or gray work for most prints, while darker matts create visual weight for bold designs. The matting width affects composition: typically 2-3 inches creates balance. Beveled edges add sophistication and visual interest. Avoid colored matting that clashes with metallic or neon elements in your print, as this disrupts the focal point and aesthetic harmony.
Ready to make your space stand out? Explore unique, conversation-starting signs at RealCoolSigns.com and find the perfect piece for your home, office, garage, or gift.